2025最新V2Ray搭建图文教程,CentOS-V2Ray一键搭建脚本!
前言
说明:由于之前搭建v2ray的搬瓦工服务器到期了,49$一年感觉还是比较贵,换了其他品牌的vps来搭建v2ray。这里选择的是RackNerd的每年10美金的vps,再者就是需要使用V2Ray一键搭建脚本,这里vps选择的系统还是CentOS 可做参考。
需要购买vps的可以参考 : 推荐三款亲测过便宜高性价比的VPS最低10美金每年(含最新优惠,支持微信和支付宝)
亲测完全可用(2025/07/06),有部分同学不能使用的,可尝试底部处理方式
V2Ray搭建
安装简单方便,自动关闭防火墙,自动安装BBR加速,因此推荐大家使用
自动安装命令:输入以下命令一键安装,回车执行
1 | bash <(curl -s -L https://raw.githubusercontent.com/xyz690/v2ray/master/go.sh) |
显示一下信息代表安装成功(可直接用以下配置进行连接)
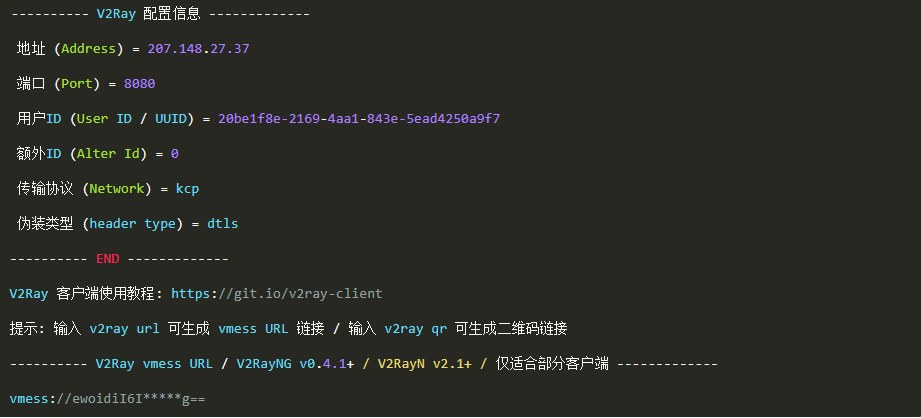
配置文件要注意(建议直接复制安装结果中 vmess://**** 地址,直接导入,避免自己填配置出错):
测试是否可行 V2ray客户端配置信息
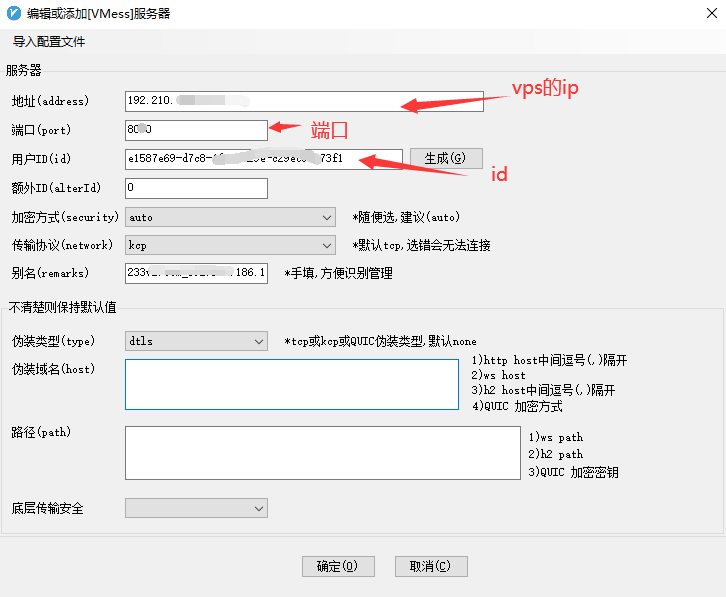
相关命令
1 | v2ray info 查看 V2Ray 配置信息 |
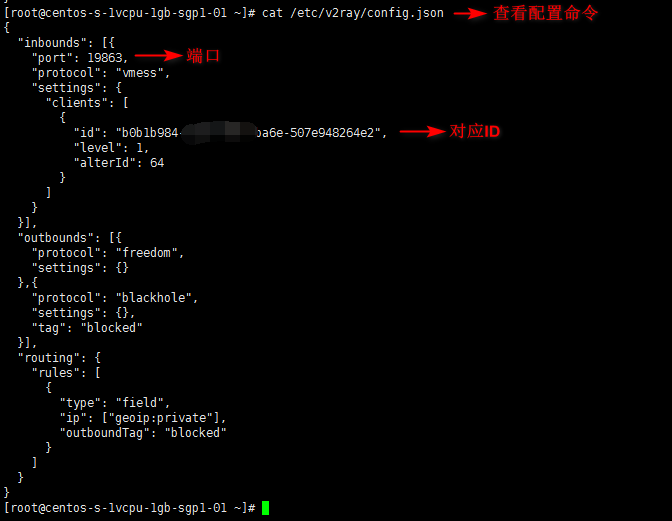
vmess协议配置
查看配置文件(该配置在后面链接时使用):
1 | cat /etc/v2ray/config.json |
电脑安装V2ray
使用的v2ray客户端
Windows:下载地址
MAC:下载地址
下载对应的版本

部分问题处理方式
1,同步时间

2,修改系统代理,选择自动匹配系统代理
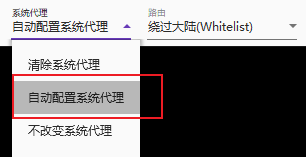
3,检查端口是否开放

4,检测ip或者端口是否被墙
https://tcp.ping.pe/
*** 本文章参考:小白福利
评论

